Understanding the Basics of Hydroponics
What Is Hydroponics and How Does It Differ from Soil Gardening
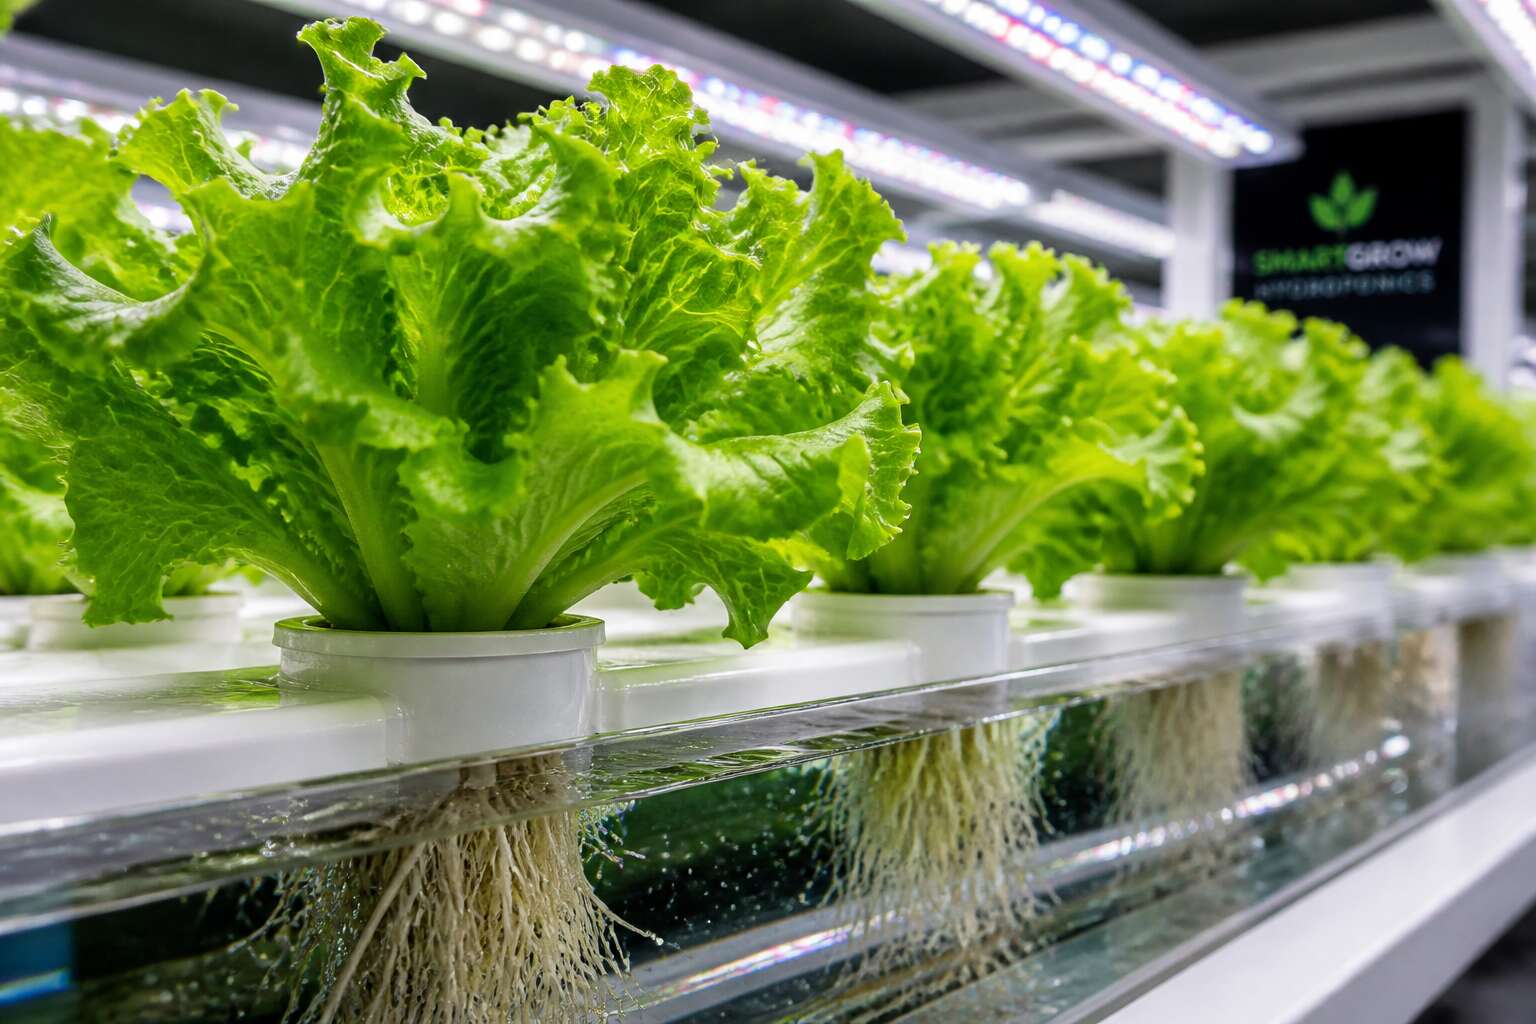
Soil is not a prerequisite for growth. Hydroponics explained simply is the practice of cultivating plants in a nutrient rich water solution, with no soil involved. This method changes the root environment entirely, allowing for direct nutrient uptake. I have never seen roots so vigorous!
Soil gardening relies on a complex web of organisms and minerals that release nutrients over time. Hydroponic systems bypass that process. They deliver precise nutrition on demand, which often accelerates plant development and reduces water consumption.
The practical differences become obvious in daily management:
- Water usage drops significantly, since systems recycle solutions.
- Nutrient levels are measured and adjusted in parts per million.
- No soil borne pests or weeds emerge from a sterile medium.
In my experience, South African gardeners facing erratic rainfall find this controlled approach a reliable alternative to traditional plots.
The Science Behind Soil-less Growing: Water, Oxygen, and Root Health
Hydroponics explained usually centres on nutrient recipes, yet the real science lies in water and oxygen. In a soil-less environment, roots are suspended directly into a circulating solution, where dissolved oxygen becomes the quiet driver of health. I have measured oxygen levels in South African systems and seen roots turn white and firm when readings stay above five parts per million. This aerobic environment encourages rapid ion exchange, so plants spend less energy searching for food.
- Oxygen levels below three parts per million invite root pathogens.
- Water temperature above 24 degrees Celsius holds less dissolved oxygen.
That is why monitoring matters. Healthy roots demand a balance between moisture and air, a balance that soil rarely provides with such precision!
Key Terms Every Beginner Should Know: Nutrient Solution, pH, and EC
When beginners ask for hydroponics explained, they often expect complicated chemistry. The real starting point is three terms: nutrient solution, pH, and EC.
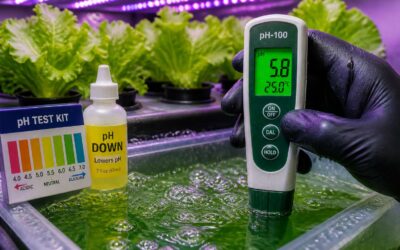
The nutrient solution is the water mixed with mineral salts that feed the roots. Unlike soil, where nutrients are locked in organic matter, this solution delivers minerals directly. pH measures how acidic or alkaline that solution is. Most crops prefer a range between 5.5 and 6.5, where iron, calcium, and magnesium remain available. EC, or electrical conductivity, tells you how concentrated the dissolved salts are. A higher EC reading means more nutrients, but too high and roots burn.
- Keep daily records of pH and EC readings.
- Adjust nutrients in small increments.
- Calibrate your meter weekly.
In South Africa’s variable climate, these readings shift quickly, so consistency matters more than perfection.
Benefits of Hydroponics: Faster Growth, Higher Yields, and Water Efficiency
South Africa receives less annual rainfall than most countries, forcing us to rethink water use. Hydroponics explained here means a system where plants grow faster and yield more per square metre. In a controlled environment, crops can mature up to 25% sooner than in soil. This acceleration comes from roots absorbing nutrients without searching through soil.
Water efficiency sets hydroponics apart. A recirculating setup loses only through transpiration, saving roughly 90% of water compared to conventional irrigation. For us, facing periodic droughts, this is a direct advantage.
The practical benefits accumulate:
- Stable harvests during dry months
- Independence from unpredictable rains
- Higher output on smaller land
That combination makes hydroponics a rational choice for South African agriculture!
Different Hydroponic Systems and How They Work
Deep Water Culture (DWC): The Simplest Active System
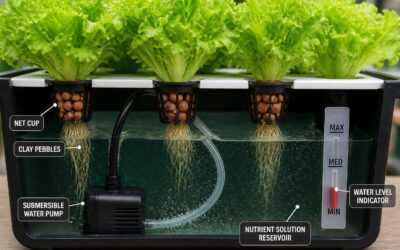
Deep Water Culture, or DWC, offers the clearest picture of hydroponics explained in action. The plant sits in a net pot, its roots dangling directly into a reservoir of nutrient solution. An air pump pushes oxygen through air stones at the bottom, creating bubbles that keep the roots from drowning.
The setup uses few components, which is why it is called the simplest active system. Unlike other methods that cycle the solution, DWC keeps it static. For South African growers, this means fewer parts to fail, though the air pump remains the one thing worth protecting during load shedding.
You need:
- A watertight reservoir
- Net pots and clay pebbles
- An air pump with air stones
- Nutrient solution
The roots stay submerged from seedling to harvest. That constant contact is what fuels the growth.
Nutrient Film Technique (NFT): A Thin Film of Endless Nutrition
A thin film of water is the only thing between a crop and certain death. That is Nutrient Film Technique, or NFT. A constant stream trickles through a sloped channel. Root tips rest in the shallow flow, while their upper sections hang in the humid air. This precise division is where hydroponics explained gets its most demanding discipline.
Unlike a static DWC reservoir, NFT relies on relentless movement. A pump lifts the solution from a sump, gravity guides it back, and the cycle repeats. The roots receive uninterrupted nutrients and constant oxygen from the exposed air.
The standard gear list includes:
- Sloped channels or pipes
- A submersible pump and tubing
- A nutrient reservoir
- Net pots with a lightweight medium
For South African growers, hydroponics explained reveals a critical vulnerability. Load shedding stops the pump, the flow ceases, and the exposed roots dry within minutes. This system demands a backup plan or constant attention.
Ebb and Flow (Flood and Drain): Periodic Feeding for Stronger Roots
Ebb and Flow, or Flood and Drain, works on a cycle of saturation and withdrawal. A timer triggers the pump, solution rises into the grow tray, and then everything drains back. That pause is not a flaw. It is the entire mechanism. Roots endure a brief submersion, then face the air. This forced recovery strengthens them. A root system that survives periodic drought becomes more resilient than one that never suffers.
The gear list is modest:
- A flood table or tray
- A timer-controlled submersible pump
- Clay pebbles or similar medium
- A reservoir with fill and drain fittings
For South African growers, the system offers a quiet advantage. A missed flood cycle due to load shedding is not a catastrophe. The roots wait. In hydroponics explained, most systems demand constant flow, but ebb and flow proves that absence can be just as important as presence. I have watched plants thrive on this rhythm.
Drip Systems: Precision Irrigation for Larger Setups
Drip systems take precision to a point of obsession. Each plant receives a slow, measured drip from a network of tubes and emitters, aimed directly at the root zone. It is the closest hydroponics gets to a tailored feeding schedule.
The emitter rates vary, the watering cycles vary, and one valve can throttle an entire row. Larger setups love this system because it scales without losing per-plant control.
- Drip emitters, adjustable or fixed
- A submersible pump with a filter to stop clogs
- Growing medium like coco coir or perlite
- Tubing and connectors for distribution
For South African growers, drip shines when water is scarce. The slow release cuts runoff and keeps every drop working. In hydroponics explained terms, this is the answer for gardeners who want high yield without flooding the whole table. Hydroponics explained usually focuses on constant flow, but drip understands restraint.
Wick System: The Only Passive Hydroponic Method
The wick system stands apart from every other method in this guide because it requires no pump, no electricity, and no moving parts. A simple rope or felt strip connects the root zone to a reservoir below, drawing nutrient solution upward through capillary action. This is hydroponics explained at its most elemental level: water moves, roots absorb, and the plant grows.
For South African beginners, this passive approach removes the fear of mechanical failure. There is nothing to clog, nothing to calibrate, and nothing to switch off. The trade-off is speed. Wicks deliver moisture slowly, making them ideal for herbs and small leafy greens rather than heavy feeders.
Consider it the entry point before committing to an active system. You learn the rhythm of nutrient management without the noise.
Aeroponics: Growing Roots in Mid-Air for Maximum Oxygen
Aeroponics suspends roots in a sealed chamber while fine misters spray nutrient solution directly onto them. The roots hang in mid-air, exposed to oxygen at every moment. This is hydroponics explained at its most extreme: no growing medium, no substrate, just roots, mist, and air.
For South African growers, the appeal is oxygenation. Roots receive more oxygen than in any other method, which accelerates nutrient uptake. The misting cycle runs intermittently, keeping roots moist without drowning them.
Consider the core components:
- A misting nozzle or atomiser
- A timer for cycle control
- A sealed chamber to retain humidity
This system demands precision. A pump failure can dry roots within hours. But for those who master it, growth rates are unmatched.
Essential Nutrients and Growing Media for Hydroponic Plants
Macronutrients and Micronutrients: What Plants Need to Thrive
Plants do not have the luxury of foraging. They depend on what you provide, and in hydroponics explained, that means a nutrient solution with 17 essential elements. Macronutrients like nitrogen, phosphorus, and potassium are needed in larger amounts, while micronutrients, including iron and zinc, matter in trace doses. Missing even one element stalls growth.
Growing media replace soil as the substrate. They anchor roots and hold moisture without suffocating them. Common options include rockwool, perlite, coco coir, and clay pebbles.
- Rockwool retains water but requires pH buffering
- Coco coir is renewable and holds air well
- Perlite improves drainage and aeration
- Clay pebbles are reusable and stable
Each medium changes how water and nutrients reach the root zone. The right choice depends on your system and the crop’s demands.
Understanding NPK Ratios and Custom Nutrient Blends
Understanding NPK ratios is where hydroponics explained becomes practical. The three numbers on a nutrient bottle represent nitrogen, phosphorus, and potassium as percentages. A balanced formula like 5-5-5 suits leafy greens, while flowering crops demand higher phosphorus. Custom blends let you adjust ratios for specific growth stages. Vegetative growth needs more nitrogen; fruiting needs more potassium. In South Africa, tap water varies by region, so test your source before mixing.
Growing media choices interact with nutrients too. Coco coir holds cations, which affects calcium availability. Rockwool needs pre-soaking to stabilise pH. A reliable routine covers three checks:
- EC of your source water before mixing
- pH after nutrients are added
- EC of runoff to detect salt buildup
These readings reveal nutrient availability before symptoms emerge.
Choosing the Right Growing Media: Clay Pebbles, Coco Coir, and Rockwool
The physical structure of your growing medium shapes how roots access essential nutrients. Clay pebbles stay chemically inert, making them ideal for systems that recirculate nutrient solution. Coco coir retains moisture and air simultaneously, though its natural cation exchange can bind calcium. Rockwool offers excellent water retention but requires buffering before first use.
For hydroponics explained to work in practice, match the medium to your system and crop. Leafy greens thrive in coco coir, while fruiting plants may prefer clay pebbles for better drainage.
- Choose smaller clay pebbles for seedlings, larger ones for mature plants.
- Rinse coco coir thoroughly to remove dust and excess salts.
- Pre-soak rockwool in pH-adjusted water until saturated.
Each choice alters nutrient availability, so watch root colour and growth rate closely.
How to Monitor and Adjust Your Nutrient Solution’s pH and EC
In any hydroponics explained system, the growing medium actively alters the nutrient solution’s chemistry. Coco coir can bind calcium and release potassium, shifting EC readings even when nothing has been added. Clay pebbles remain inert, but their surface can harbour biofilm that slowly changes pH.
Monitoring requires a routine that accounts for these interactions. A sudden EC drop often signals that roots are feeding heavily. A sudden rise means the solution is too concentrated, or the medium is releasing salts. pH drift tells a different story: rising pH suggests nitrate uptake, while falling pH points to ammonium or phosphate activity.
- Calibrate pH and EC meters weekly.
- Take readings at the same time each day.
- Compare runoff from the medium with the reservoir solution.
These numbers only make sense when you understand your chosen medium’s behaviour. That is hydroponics explained through practice.
The Role of Beneficial Bacteria and Root Supplements
The role of beneficial bacteria in a hydroponics explained system often goes overlooked. Bacillus subtilis colonises the rhizosphere and outcompetes pathogenic fungi, while Trichoderma species parasitise root rots and free up nutrients trapped in coco coir. These microbes keep the root zone stable when pH and EC readings swing between feeds.
- Bacillus amyloliquefaciens for disease suppression
- Mycorrhizal fungi for phosphorus uptake in coco coir
- Humic acid for cation exchange capacity in aged media
Root supplements support this living work. Fulvic acid chelates trace minerals, making iron and manganese available at the root surface. Silica strengthens cell walls and reduces heat stress in the South African summer. When the growing medium holds water and air in the right balance, these additives help plants absorb more from every feed. That interaction between medium, microbe, and supplement is hydroponics explained correctly, because roots never act alone.
Setting Up Your First Hydroponic Garden
Selecting the Perfect Location: Light, Temperature, and Ventilation
South Africa’s abundant sunshine is a boon, but it demands careful placement. Hydroponics explained in practical terms starts with location. Your garden’s success hinges on consistent light, stable temperature, and moving air. I often tell beginners to observe their space for a full day before committing.
A south-facing window works well in the Southern Hemisphere, though supplementary grow lights become necessary during overcast stretches. Aim for 14 to 16 hours of light daily. Temperature should hover between 18 and 24 degrees Celsius, as fluctuations stress roots. Ventilation prevents stagnant air and fungal issues, so place a small fan nearby.
These three elements form the foundation of any setup. Without them, nutrient solutions and media cannot compensate.
Step-by-Step Guide to Assembling a Simple DWC System
Setting up a DWC system is simpler than social media suggests. Hydroponics explained through direct assembly reveals how little equipment you actually need. Begin with a lightproof container, as algae despise darkness. Drill a hole for a net pot, then fill the container with water and balance the pH to 5.8. Add the nutrient solution and connect an air pump to an air stone.
- Place the air stone in the empty container.
- Fill with water and nutrients.
- Suspend the plant in the net pot with clay pebbles.
- Plug in the pump and wait.
Within hours, bubbles surround the roots. Within days, the plant adjusts its posture. There is elegance in watching roots grow white and vigorous. The system hums along, indifferent to your attention.
Lighting Options for Indoor Hydroponics: LED vs. Fluorescent vs. HPS
Lighting determines yield more than any other variable in an indoor garden. For hydroponics explained in practical terms, the grow light sits at the centre of your environmental control. LED panels offer spectral precision and low heat output, which suits South Africa’s warmer climate. Fluorescent tubes remain effective for propagation and leafy greens. HPS fixtures deliver intense lumen output for fruiting crops but require ventilation to manage heat.
- LED: highest upfront cost, lowest running cost
- Fluorescent: cheapest entry point, limited penetration
- HPS: proven yield performance, high heat dissipation
Each option changes how your nutrient solution behaves, since leaf temperature drives water uptake. Hydroponics explained through lighting reveals the interplay between energy input and plant response.
Seed Germination and Transplanting into Your Hydroponic System
Every thriving hydroponic garden begins before the roots ever touch water. Seed germination in a soilless medium is hydroponics explained at its most tender stage. In South Africa’s variable climate, starting seeds in rockwool cubes or coco coir gives you control over moisture and temperature.
A heat mat set to 24 degrees Celsius encourages consistent germination. A humidity dome preserves ambient moisture. Rockwool holds water well, coco coir offers aeration, and vermiculite lightens the mix. These media give young roots structure without the unpredictability of garden soil. This early phase is hydroponics explained through observation, because roots respond quickly to balanced conditions.
Once the first true leaves unfurl, transplanting carries those fragile plants into your system. The medium rinses away from the roots, the seedling settles into a net pot filled with clay pebbles, and the pot lowers into the DWC reservoir. This transition from germination to hydro is forgiving!
Common Challenges and Solutions in Hydroponic Cultivation
Algae Growth in Your Reservoir: Causes and Prevention
Algae growth in your reservoir creates immediate problems. It enters when light reaches your nutrient solution, and within days, that clear water turns murky green. I have seen reservoirs turn green within 48 hours of a single light leak. Algae steals oxygen from roots and clogs pumps.
The root cause is always light penetration. A tiny gap in the lid or a translucent tube is enough. For anyone seeking hydroponics explained in practical terms, algae growth destabilises pH and invites harmful bacteria.
Prevention requires discipline:
- Use opaque reservoirs and seal every access point.
- Cover exposed growing media with light-blocking film.
- Maintain solution temperatures below 24°C.
- Clean your system between crop cycles.
Algae thrives on neglect. Stop it before it starts!
Root Rot and Pythium: Identifying and Treating Root Diseases
Pythium root rot spreads through a hydroponic system with alarming speed. I have watched a healthy crop collapse within days of the first brown streak appearing on a root. One day roots are white and firm, the next they turn slimy and sour. This is where hydroponics explained becomes practical rather than theoretical. Identification is straightforward: healthy roots stay crisp and pale. Infected roots collapse at the touch. Plants wilt even when the pump runs constantly.
- Roots turn mushy and lose their crisp texture
- A rotten odor rises from the reservoir
- Plants wilt despite constant moisture
Treatment demands swift action. Remove affected plants immediately. Sterilize the reservoir with diluted hydrogen peroxide. Rebuild the root zone with beneficial bacteria containing Bacillus subtilis, which outcompete Pythium on root surfaces. Keep solution temperatures between 18°C and 22°C. Act within 24 hours of spotting symptoms, or you lose the crop!
Nutrient Burn or Deficiency: Reading the Leaves and Correcting Imbalances
Hydroponics explained through leaf inspection starts with nutrient burn. Leaf tips turn brown and crisp when EC levels run too high. I see this in systems where growers push nutrient strength to accelerate growth. The plant cannot absorb water faster than salts accumulate in leaf tissue. The opposite problem, a deficiency, appears as yellowing between veins or older leaves fading to pale green.
Reading the leaves requires a systematic approach.
- Check the youngest leaves first for mobile nutrient issues.
- Look at older leaves for nitrogen or phosphorus shortages.
- Compare leaf color against the healthy baseline of new growth.
Correcting an imbalance starts with diluting the reservoir and testing runoff. This is where hydroponics explained becomes a matter of observation rather than guesswork. Plants recover within days when the signs are caught early.
Managing Pests Without Soil: Aphids, Spider Mites, and Fungus Gnats
Even in a soil-less utopia, pests show up. Aphids hitchhike on new cuttings. Spider mites spin tiny webs under leaves. Fungus gnats buzz around your reservoir because they love moist media. Hydroponics explained often skips this part, but you will deal with them. So what do you do?
- Quarantine new plants for a week.
- Use yellow sticky traps for gnats.
- Spray with neem oil or insecticidal soap.
Then check the air circulation. A fan keeps mites from settling. Your plants will reward your vigilance with clean photosynthesis.
Avoiding Pump Failures and Power Outages: Backup Strategies
One silent pump failure can ruin a thriving hydroponic garden within hours. In South Africa, load shedding makes power outages a constant threat. Hydroponics explained often focuses on nutrients and light, but water circulation is the lifeline. A dead pump means roots suffocate, and nutrient solution stagnates.
I recommend a backup battery or a solar-powered pump for critical systems. For deeper protection, install a secondary pump that activates automatically. A simple float switch can alert you to low flow. Regular maintenance prevents most failures.
- Check impellers and tubes monthly
- Keep a spare pump on hand
- Test your backup system weekly
Power outages require a plan. A UPS unit buys you precious minutes. A generator extends that to hours. Monitoring sensors send alerts to your phone. With these strategies, your system survives the unexpected.

0 Comments