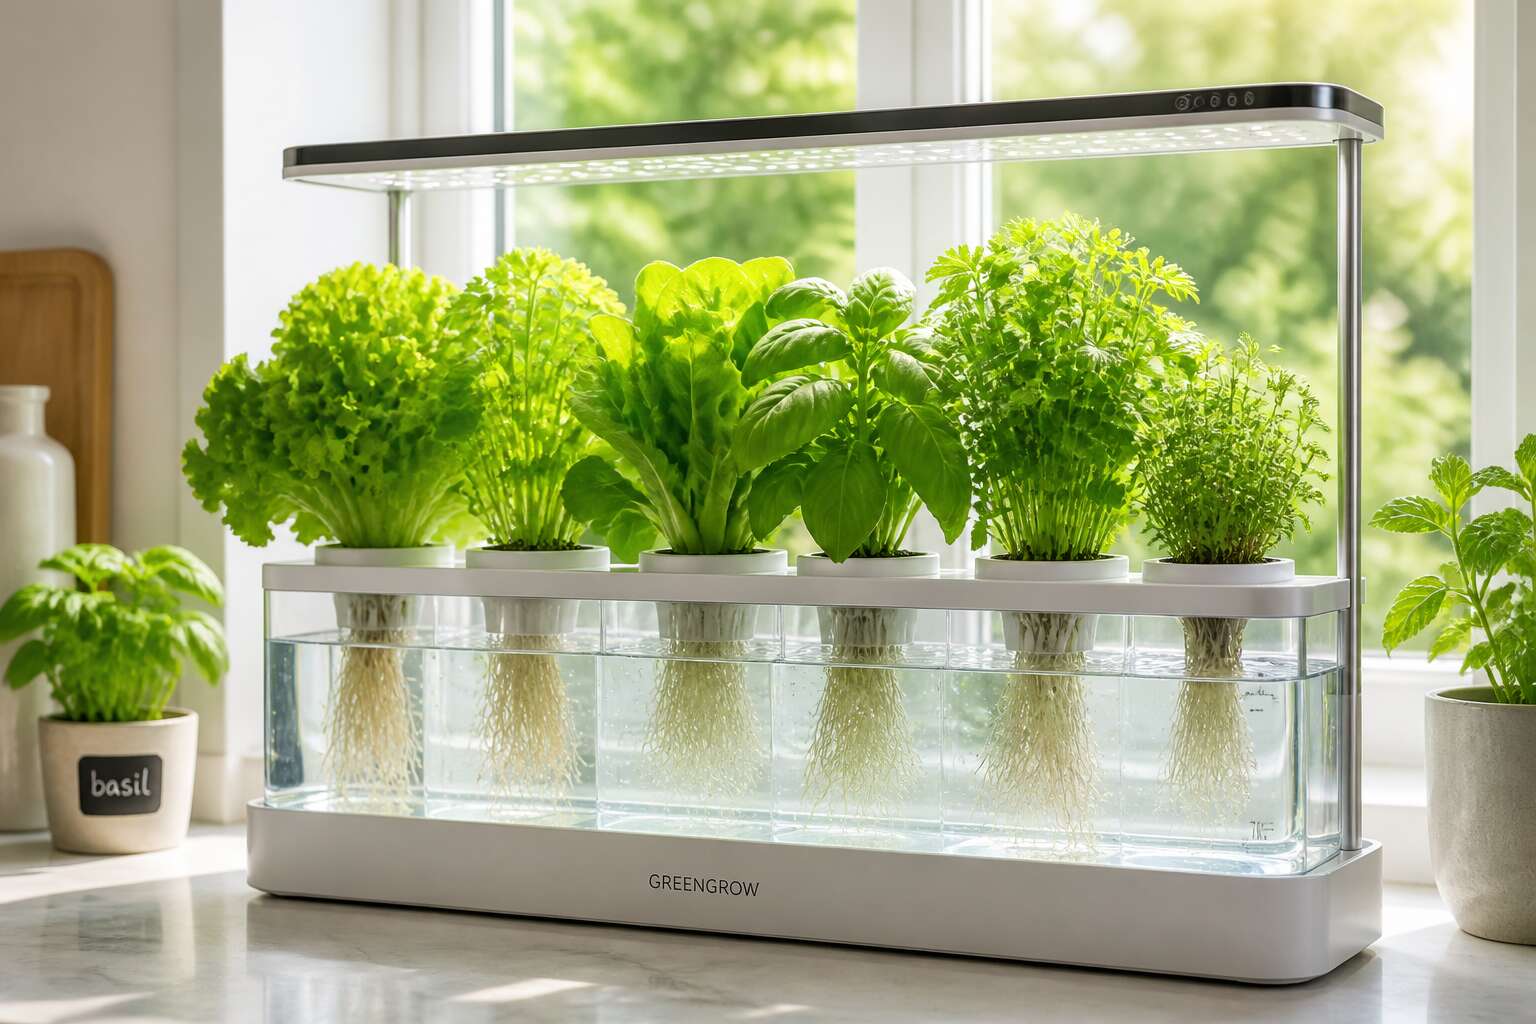
Types of Hydroponics Containers
Net Pots and Mesh Cups
When you start exploring hydroponics containers, net pots and mesh cups appear as close cousins. They both let water and nutrients flow freely to the roots, yet each has a distinct role in the garden. I have found that choosing between them depends on your plant’s stage of development.
- Net pots offer a rigid frame for mature plants
- Mesh cups cradle fragile seedlings with a finer weave
Net pots fit into larger openings in a hydroponic system, giving roots ample space to spread. Mesh cups slide into smaller slots, keeping young roots moist without drowning them. Both options help you avoid the mess of loose media while maintaining excellent oxygen circulation.
Baskets and Grow Pots
Root health begins with the vessel that anchors the growing media. Baskets and grow pots act as the structural frame for many hydroponics containers, cradling clay pebbles or perlite while keeping the plant crown firmly in place. These vessels extend beyond net pots, providing depth and stability for established roots.
Some growers choose baskets for their adaptability:
- Wide rims rest securely on raft lids.
- Splayed openings allow effortless root inspection.
In my experience, grow pots suit plants with heavy fruiting loads. Their tall, solid walls prevent root disturbance during transplanting and limit evaporation around the stem. The priority remains steady oxygen flow and consistent moisture. Matching the vessel to the crop stage improves overall performance in any hydroponics container.
Buckets and Bin Containers
A single twenty litre bucket can carry a mature tomato plant through an entire fruiting cycle. Buckets and bin containers are the most adaptable hydroponics containers for growers who need real nutrient reserves instead of shallow wicking zones. The enclosed design limits evaporation, keeps roots in darkness, and provides a stable environment for deep water culture. In South Africa, where summer heat can spike quickly, this water retention becomes a practical advantage.
Food grade plastic matters immensely. Translucent buckets allow light to reach the root zone, inviting algae and pathogens. Opaque, heavy duty options maintain more consistent temperatures and protect sensitive root systems. Wide bins offer horizontal space for multiple plants, making them valuable for leafy crops that grow outward rather than upward. The depth of a bin also buffers sudden changes in nutrient strength, giving busy growers a margin for error. Choosing the right vessel is simply about matching volume to the crop’s thirst.
Vertical Tower Systems
Vertical tower systems turn a cramped balcony into a productive growing wall. In South African townships and city flats, where horizontal ground is scarce, these structures push upward. Each column holds several planting pockets, but the real trick is the internal drip line. Nutrient solution flows from the top, cascades down the roots, and collects in a small reservoir at the base.
I admire how a single tower can host lettuce, herbs, and even strawberries without mixing root zones. Nutrient delivery stays consistent, though you must monitor pump pressure closely. Consider the layout options:
- Freestanding towers with a 360 degree planting surface
- Wall mounted units that attach to existing fences
- Rotating models for even light exposure
These hydroponics containers suit compact operations, and the vertical design reduces splashback during watering.
Materials and Durability
Plastic vs. Glass Containers
Plastic remains the standard for hydroponics containers in South Africa, but glass challenges that norm with its own merits.
The two materials differ sharply in durability. Plastic flexes under pressure and resists shattering, yet UV exposure makes it brittle after a year or two. Glass holds its structure with absolute integrity, though a single drop can end its life instantly.
- Plastic survives rough handling and frequent moves
- Glass withstands repeated cleaning without scratching
I have seen growers in Johannesburg prefer plastic for rooftop hydroponics containers, while glass suits controlled indoor environments where stability matters most.
Food-Grade vs. Non-Food-Grade Options
The material of your hydroponics containers determines far more than longevity. Food-grade HDPE and polypropylene resist chemical leaching, while non-food-grade plastics may release additives into your nutrient solution. This distinction matters when you grow edible crops.
Consider these common options:
- Food-grade HDPE, resin code 2, handles repeated cleaning without degrading.
- Polypropylene, resin code 5, provides similar safety for long term use.
- Non-food-grade PVC often contains phthalates, which pose risks for leafy greens.
I have seen South African growers fixate on price, yet the durability of hydroponics containers rests on material quality. A thin food-grade wall can outperform a thick questionable one.
UV Resistance and Sunlight Exposure
South African sunlight does not negotiate. It degrades polymer chains over time, leaving cheap hydroponics containers brittle and prone to cracking. UV stabilizers slow this process, but only if the manufacturer bothered to add them. Clear containers fare worst, while opaque or dark materials resist photodegradation far better.
Check for UV stabilizers or additives in the resin. Polypropylene and HDPE with UV inhibitors survive multiple seasons. Without them, expect discolouration, surface crazing, and structural failure. Consider also:
- Thicker walls delay UV damage, but do not prevent it.
- White or reflective surfaces reduce heat absorption inside the root zone.
- Positioning containers away from direct afternoon sun extends their lifespan.
Some growers paint their hydroponics containers with exterior-grade acrylic, which adds a sacrificial layer. This works, though the paint itself will eventually flake. The real lesson is that sunlight exposure is a design factor, not an afterthought.
Insulation and Temperature Regulation
The material of your hydroponics containers dictates more than longevity. It governs the thermal rhythm of the roots. A thin, flimsy vessel allows the nutrient solution to swing with the ambient air, spiking during the day and plummeting at night. This instability stresses the plant, siphoning energy away from growth and into survival.
Thick-walled hydroponics containers act as a thermal buffer. They slow the exchange of heat between the solution and the environment, maintaining a stable root zone even when the air outside turns brutal. Consider how different materials conduct heat. Polypropylene and HDPE offer low thermal conductivity, which means they resist sudden temperature changes. Black plastic, however, absorbs solar radiation and turns the solution into a warm bath, which encourages pathogens.
The structural density of the resin directly influences this inertial effect. Thicker walls provide more mass, and this mass resists temperature fluctuation. This is the same principle that keeps a cave cool in summer. Insulation is not always about material, but about volume and surface area. A tall, narrow container exposes more surface area to the air. A wider, squat design reduces that exchange.
Metals, by contrast, are terrible insulators. They shed heat quickly and accept it just as fast. Plastic remains the superior choice for most growers, but not all plastics are created equal. The exact blend of resin and additives determines its insulating properties.
The hidden benefit of stable temperatures is oxygen retention. Warm water holds less dissolved oxygen. When your hydroponics containers keep the nutrient solution cool, they hold more of the air the roots need. This is a simple equation for healthier growth. So think of the container not as a passive bucket, but as an active participant in your climate control.
– Thermal conductivity values vary widely among plastics. Polycarbonate and PVC sit at different ends of the spectrum.
– The colour of the container impacts solar gain. Light colours repel heat. Dark colours absorb it.
– The ambient space around the container matters. Indoors, these variables are easier to control. Outdoors, the soil and air temperature are constantly shifting.
The best hydroponics containers offer a compromise between durability and thermal performance. Rigid plastics like HDPE provide that balance. They withstand the pressure of a full water column without warping, and their molecular structure resists the transfer of heat. Choose the thickness that matches your climate. A coastal grower with mild nights has different needs than a Highveld grower facing frost.
Size and Capacity Considerations
Matching Container Size to Plant Type
Roots demand space. A tomato plant requires at least 20 liters of root zone volume to produce fruit. Choosing hydroponics containers without accounting for mature plant size is a common failure. I have seen gardeners try to grow a zucchini in a bucket meant for basil. The outcome is predictable because we often ignore the limits we impose on other living things. Stunted root development, nutrient stress, and bitter fruit. Match the container to the plant’s final dimensions. Leafy greens thrive in wide, shallow trays. Fruiting crops demand depth for downward root expansion. A practical guide:
- Herbs: 3 to 5 liters
- Lettuce: 10 liters
- Peppers and bush beans: 15 to 20 liters
- Tomatoes and cucumbers: 30 liters or more
Capacity determines hormonal response. When your hydroponics containers underserve the roots, the plant diverts energy from fruit to survival. Choose volume with the same seriousness you would apply to soil fertility.
Space Optimization for Small Areas
Space is the silent arbiter in any growing operation. In a country where high-density living is becoming the norm, the size of your system determines what you can cultivate. A sprawling NFT channel setup makes little sense on a balcony in Johannesburg or a courtyard in Cape Town. The solution lies in vertical integration and careful footprint planning. You can achieve remarkable yields by stacking layers and exploiting upward growth, which directly reduces the square meterage required per plant.
When selecting hydroponics containers, the goal is to maximize root capacity without sacrificing valuable floor area. This leads to a specific design logic that prioritizes height over width. For a small area, consider these configurations:
- Deep, narrow towers for herbs and strawberries, which allow for a small diameter but significant rooting depth.
- Rectangular, trough-like containers that fit flush against a wall, utilizing dead space.
- Stackable modular units that combine a grow chamber with a built-in reservoir, eliminating the need for separate tanks.
The interplay between container shape and system volume is a tactical decision. You must calculate the water and nutrient reservoir capacity to sustain the plant mass you intend to support. A smaller container holds less solution, which means it is more susceptible to temperature swings and pH drift. This demands a more disciplined approach to monitoring, but it also reduces waste and water usage. The true skill in space optimization is not about squeezing more plants into a corner, but about creating a self-contained ecosystem where every liter of nutrient solution is utilized. The focus shifts from raw size to efficient turnover, ensuring that your hydroponics containers work as hard as the plants they hold. The correct volume provides stability, while the compact shape provides access. This balance is the only way to grow successfully in the confines of a modern South African home. The plants do not care about the aesthetics of your system, only the available root space and the consistency of the supply within it.
Water Volume and Reservoir Capacity
One mature tomato plant can draw nearly two litres of nutrient solution per day during peak fruiting. That figure should inform every reservoir decision, yet many growers choose tanks by shelf size alone. In South Africa, where municipal water outages and dry spells recur, volume is a survival mechanism.
The water inside your hydroponics containers acts as a buffer. Larger reservoirs absorb temperature swings and slow pH drift. Smaller volumes oscillate sharply, demanding daily attention and failing quickly when power outages interrupt your pumping schedule.
When calculating the working capacity of the system, a familiar pattern emerges:
- Leafy herbs: 2 to 4 litres per plant
- Fruiting crops: 8 to 12 litres per plant
- Heavy feeders such as cucumbers: 15 litres or more per plant
Root mass displaces liquid, and the access lid reduces the actual fill level. The gap between static capacity and usable capacity varies widely across hydroponics containers, which explains why many systems run dry sooner than their labels suggest.
Drainage and Aeration Requirements
Every hydroponics container presents a drainage personality. Some empty swiftly, others dribble. The quiet truth is that a reservoir which empties too fast leaves roots parched between cycles. A reservoir which drains too slowly keeps roots submerged while oxygen levels fall. In South African summers, the difference becomes visible within hours.
- Drainage requirement: position outlets at the lowest point and avoid flat bases that trap a film of nutrient solution.
- Aeration requirement: allow for a gap between the water surface and the growth medium to encourage air exchange.
Larger hydroponics containers magnify both problems. Capacity beyond twenty litres demands careful attention to these requirements. The standard design challenge is not volume alone, but the relationship between outflow and airflow. A container with generous capacity and weak aeration will stunt root development.
Growth Stage and Root Development
A tomato plant doubles its root mass every ten days during peak vegetative growth. The container that suited it in week three becomes restrictive by week six. This is why sizing hydroponics containers requires foresight, not guesswork.
Growth stage dictates volume. Seedlings need small cells that hold moisture without drowning delicate roots. Mature plants require generous reservoirs that support extensive root networks. The transition matters more than the destination.
We typically see these general ranges:
- Cuttings and seedlings: 0.5 to 2 litres
- Leafy greens and herbs: 2 to 5 litres
- Fruiting vegetables: 10 to 20 litres or more
Root development responds directly to available space. Restricted roots circle the container wall and form tangles that struggle to absorb nutrients. Oversized vessels hold stagnant solution around underdeveloped roots, encouraging rot. Successful growers select hydroponics containers based on mature root size, moving plants through progressively larger vessels as growth demands.
Container Setup and Maintenance
Cleaning and Sterilization Best Practices
A single dormant spore can survive on a rough seam for months. That is the hidden risk inside every reservoir, and it is why the discipline of cleaning hydroponics containers rivals the art of nutrient mixing. I prefer a two step sterilization ritual that begins with a dry wipe to dislodge mineral salts, followed by a soak in a sodium hypochlorite bath. Do not rush this. Many growers forget the lid edges and the unseen corners beneath the rim. The following procedures are standard in South African greenhouse operations:
- Dilute household bleach to 5 percent and circulate it for fifteen minutes.
- Rinse three times with plain water to remove all chlorine residue.
- Air dry upside down on a dedicated rack to prevent biofilm recolonization.
Remember that hydroponics containers made from food grade high density polyethylene tolerate heat, so a steaming rinse is possible. However, glass bottles need a gentler approach. Use a bottle brush and warm vinegar. The goal is to remove the organic film before it becomes a habitat, not to achieve pharmaceutical sterility. Frequency depends on your ambient temperature; Durban’s humidity demands more attention than a Karoo winter.
Managing Nutrient Solution Levels
Managing nutrient solution levels is where many South African growers discover the difference between a thriving root zone and a stagnant one. The waterline in your hydroponics containers should never fluctuate wildly between top-ups, as dramatic swings stress the root system and alter nutrient concentration.
I check levels twice daily during Highveld summers, when evaporation accelerates. The solution should sit just below the net pot base, allowing the roots to reach down while keeping the crown dry. A float valve simplifies this task, but manual monitoring suits smaller setups.
- Top up with plain water between nutrient changes
- Monitor electrical conductivity after each adjustment
- Observe root colour as an indicator of solution health
This routine prevents the silent creep of nutrient imbalance that often goes unnoticed until leaf tips begin to brown.
Light Blocking to Prevent Algae Growth
Algae does not wait for an invitation. One crack of light in the wrong place and your nutrient solution turns green within days. This is a common failure point in hydroponics containers across South Africa, especially on sun-drenched patios in Gauteng or the Cape. Any translucent material, even a tiny gap around a lid, permits photosynthesis in the reservoir. Once algae takes hold, it competes with your roots for oxygen and can clog drip lines within a week.
The solution is not complicated. You need complete darkness inside the container where the water and roots live. For DIY setups, paint the exterior of your vessels with two coats of a black or dark grey plastic primer. Alternatively, wrap the outside with foil tape or a reflective mylar sheet. These materials also deflect heat, which supports your existing temperature regulation efforts.
- Cover all transparent walls with opaque paint or tape.
- Seal any entry points where tubing or net pots breach the lid.
- Inspect reservoirs weekly for hairline cracks that develop from sun exposure.
Remember that algae thrives on dissolved phosphorus and warmth. A nutrient solution at 24 degrees Celsius in a clear container is essentially a breeding pool. The cost of correcting this mistake after the fact is high; you will need to drain, scrub, and restart your cycle. Prevention here is a one-time effort. Proper light blocking in your hydroponics containers is the cheapest insurance against a slimy, oxygen-starved root zone that sets your grow back by two weeks. Do it before you fill the system, not after.
Temperature Control Tips
Temperature control starts before you add a single drop of water. South African summers heat exposed reservoirs quickly, and winters freeze the roots of unwary growers. Place your hydroponics containers where they receive morning sun but afternoon shade. The difference can be five degrees or more.
Consider the surface beneath your system. Concrete radiates heat long after sunset. A layer of shade cloth or a wooden pallet creates an air gap that helps stabilise temperatures.
Routine maintenance also matters. Check water temperature at the same time each day, preferably early afternoon. If the reservoir exceeds 26 degrees Celsius, intervene immediately:
- Float a frozen water bottle in the reservoir for a few hours.
- Drape a damp towel over the exterior to encourage evaporative cooling.
- Move the container to a shadier spot during heatwaves.
In winter, a small aquarium heater keeps the root zone productive. Your hydroponics containers will reward consistent temperatures with faster growth and fewer disease problems.
Regular Inspection and Replacement Schedules
The physical toll on hydroponics containers often goes unnoticed because the damage happens out of sight, beneath the surface. A reservoir can lose its structural integrity slowly, so slowly that the grower only sees the problem after a catastrophic split. The South African sun is particularly cruel, accelerating polymer degradation until the material becomes brittle and fragile. By the time you see a hairline crack, the container may already be leaking nutrients into the surrounding environment, a silent drain on your system and your wallet.
My rule of thumb is to perform a tactile inspection every month. Run your fingers along the seams and corners, the usual stress points. Flex the plastic gently. If it resists with a snap or shows white stress marks, its life is nearing its end. The five year mark is a good estimate for most food-grade plastics, but that assumes they have been shielded from UV light and extreme temperatures. If you have not been diligent about shading, expect a shorter lifespan.
Establish a replacement schedule for components that see heavy use. Do not wait for failure.
1. Inspect all container walls and bases at the start of each month.
2. Test gasket integrity every quarter if your system uses them.
3. Replace any container showing discolouration or stiffness immediately.
4. Swap out lids or covers every two years, as they warp first.
5. Re-evaluate your whole system each season to account for wear.
The steady ritual of examination saves you from emergency trips to the hardware store. A container that feels tacky, smells of plastic, or shows any sign of fatigue should be retired from service. Your hydroponics containers are the foundation of the entire operation, and foundations need attention long before they crumble. Consider it a discipline, not a chore. The quiet diligence of inspection prevents the loud chaos of collapse, and that is a trade every grower should happily make.
DIY vs. Commercial Containers
Advantages of DIY Containers
Commercial systems look sleek, but DIY hydroponics containers offer real value. I have built my own from repurposed coolers and PVC pipes, and the savings are immediate! You control the dimensions, which matters when space is awkward. Buying off the shelf often means accepting standardised dimensions. With DIY, you can adapt for unusual spaces or specific crops. Cost is the main advantage, but there are others:
- You choose the material, ensuring food grade and UV resistance.
- You can modify drainage and access points without voiding a warranty.
- You gain understanding of your system’s anatomy.
When you build your own hydroponics containers, you become a designer as well as a gardener. That knowledge pays off during maintenance. Commercial options are convenient, but they limit your ability to experiment. For anyone serious about growing, the DIY route turns a container into a personal statement of efficiency.
Limitations of DIY Approaches
Commercial systems hide their flaws behind warranty stickers. DIY hydroponics containers expose every mistake you make. I learned this when my sealant failed on a 40 litre reservoir. The water damage in my garage cost more than the system I built.
DIY approaches demand maintenance discipline:
- Inconsistent flow rates can starve roots
- Non standard fittings complicate replacement parts
- Structural weak points appear under constant moisture
- Leaks emerge at the worst moments
You trade certainty for savings. That trade requires testing, patience, and a tolerance for failure. Commercial systems offer predictability. DIY offers lessons. Both can grow crops. Only one steals your weekends.
Top Commercial Container Options
Commercial hydroponics containers tempt you with factory sealed certainty. Every fitting is tested, every seam is welded in controlled conditions, and the design has survived years of real world abuse at scale. For a grower who has mopped up a silent leak at midnight, that reliability feels like magic. The trade off is that you are buying a closed ecosystem. The clever engineering that prevents leaks also limits how deeply you can modify the system to suit unusual crops.
The real difference surfaces in the daily rhythm of the waterworks. DIY rigs demand that you think like a plumber, but commercial units allow you to think purely like a botanist. You spend your energy on pH swings and nutrient ratios instead of wrestling with a wobbling grommet. That is the luxury of paying for someone else’s engineering anxiety.
- UV stabilised plastic bodies that resist typical South African sunlight damage
- Precision cut channels that guarantee even flow distribution to every root zone
- Modular lids with tool free access for fast plant inspections
- Reinforced drain ports that accept standard irrigation hoses without custom adapters
A major advantage of the commercial route is the biological stability it brings to your garden. Because the flow dynamics are mathematically predictable, you can rely on consistent oxygen delivery to the root mass. In hot Highveld summers, many growers struggle to keep water temperatures stable in improvised bins. The thicker wall construction used by professional growers resists temperature swings, which matters for crops like basil or lettuce that wilt when their roots cook. When you calculate your seasonal yield against the cost of your labour, the price tag on a proper hydroponics containers unit often justifies itself. The certainty lets you scale up without fearing that a patchwork system will fail at the peak of the growing cycle.
Cost-Benefit Analysis
The real cost of a hydroponics containers setup never appears on the receipt. A DIY bin costs a fraction of a commercial unit, yet every silent afternoon spent nursing a leaking tap is time you cannot bill. I have watched growers spend more hours patching bins than tending plants. The commercial price buys a predictable growing season, and in South Africa, predictability is a luxury.
Break down your own labour at R150 per hour and the arithmetic shifts. Consider what the commercial route removes from your calendar:
- Three hours of average monthly repairs on improvised systems
- Emergency trips to plumbing suppliers mid-cycle
- Yield losses from root disturbance during patching
Most growers underprice their own attention. The question is not what you spend upfront, but what your focus is worth when the roots are wilting.
Customization and Expansion Possibilities
Customization separates a working system from a contrivance. A DIY reservoir allows you to drill extra bulkhead fittings, thread in a second return line, or elevate a lid for deep root zones. Commercial hydroponics containers arrive with engineered tolerances that discourage improvisation but reward modular thinking.
Expansion follows different logic on each path. With DIY, you add another bin and splice the plumbing. With commercial systems, you purchase matching interconnect kits to keep flow rates consistent. I have seen both approaches stall: DIY stalls from leaky joins, commercial stalls from stock shortages.
- DIY: alter port sizes, reposition drains, adapt for odd spaces
- Commercial: standardized connections, predictable pressure, clean expansion
The real divergence shows when a crop outgrows its container. A DIY unit can be cut, extended, or re-purposed with a hacksaw. A commercial unit forces a decision: live with the limitation or buy the next size up. The choice of hydroponics containers shapes how quickly the system adapts to new crop cycles and available space.

0 Comments